Building a home object mobile monitoring platform with the old A10
First of all, the background of this A10 development board. By chance, Xiaobian I received a board of A10, a lion board from the distant Bulgaria - OLIMEX A10-OlinuXino-LIME. After receiving it, I found a good engineer for the first time and did a very careful evaluation.
In fact, the engineer refused at the beginning. Yes, it was the engineer who liked to catch up with the new wave. I don’t know if I can point it out (with these development boards, whoever wants the Tmall Elf). Why would he refuse? Because he is chasing new, he loves to show off. An old A10, what good is he and his friends? ?
However, under my ku (ku) profit (ai) lure (qiu), he did his best to make a detailed evaluation, and found the only highlight of this development board: "SATA Is the highlight - A10-OLinuXino-LIME single board computer evaluation. Then, this board, completed its mission, was thrown into the bottom of the box.
A development board that also carries the 2011 chip is like a beauty on the calendar 10 years ago - no one wants to take another look.

But in fact, the work of A10-OlinuXino-LIME is still very solid, the components are arranged in a tight and orderly manner, the peripheral resources are also rich, and there are many necessary interfaces. Inside and outside, there is a fascinating god.
It’s not a blow, but it’s much better than many big-name original factories.
I want to find a good family for it!
I want to find a good family for it!
I want to find a good family for it!
So I hid it in a pile of boards and made a trial activity. I am looking forward to someone to take it away, to protect it, to make it work for the elderly and to revitalize it.
At the end of the event registration, I glanced at the background. Yu~ Actually an engineer applied for this board!
I immediately passed the application and delivered the board to him.
Subsequently, this engineer named ICLYL used this old A10 development board to build a samba shared file system, realized the FTP remote file transfer server, made a personal camera, and finally he also built a home monitor, but also Moving objects for monitoring...
I am deeply impressed by this spirit of indomitable, and hereby move his trial process and share it for everyone!
If you have an A10 board in your hand, don't sneer at it, let's see how others play!
table of Contents:
1. First out of the box evaluation
2. System burning and configuration
3. Network configuration and VNC remote desktop
4. update update system prompts error resolution
5. Installation of vi/vim editing tool
6. Build a samba shared file system
7. Implement FTP remote file transfer server
8. Making a personal camera
9. Home monitoring - moving object monitoring detection motion
(The following content is from ICLYL)
1. First out of the box evaluation
First of all, I am very grateful to the support of 21IC. I got the board when I was a year ago, but I have been unpacking since I was too young.
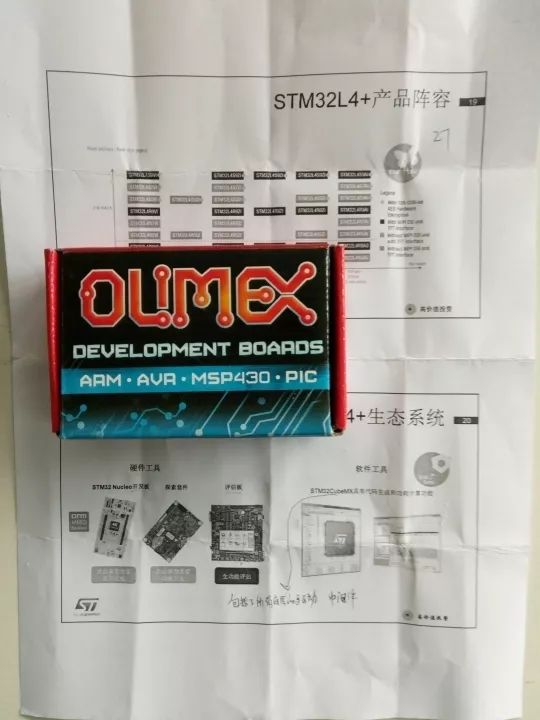
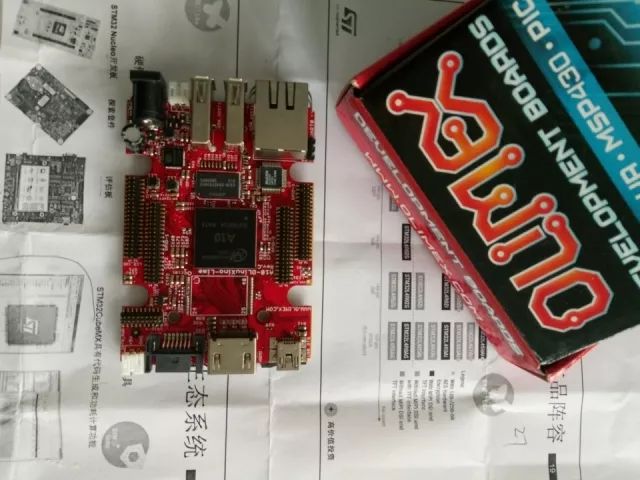
The courier comes with a promotional A4 paper of STM32L4+, which is shot as follows:
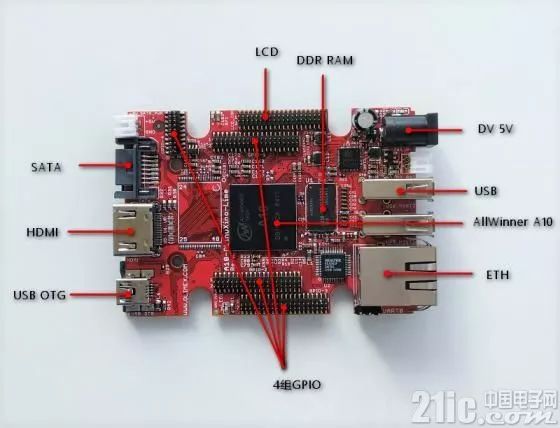
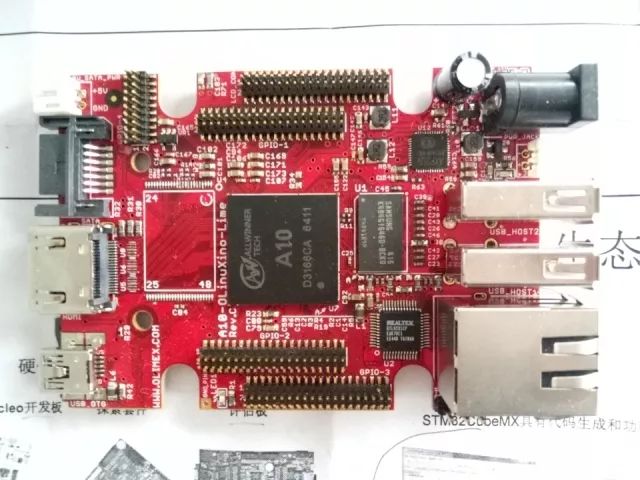
Frontal photo: you can see that the layout is very compact and the port is rich
But the fly in the ointment is:
Double row plug is 1.27mm (50mil) is not common 2.54mm (100mil)
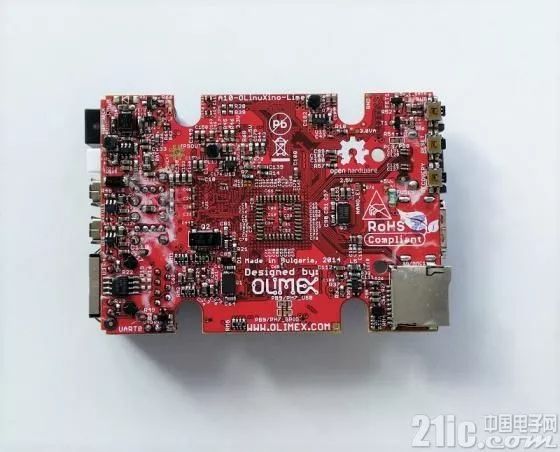
Reverse photo:
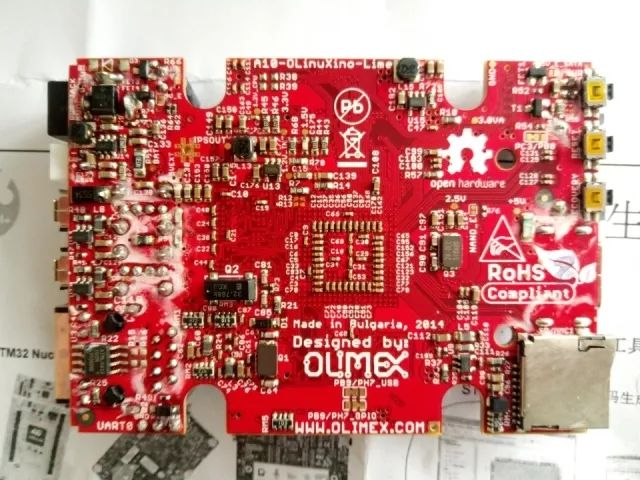
The board almost puts devices such as capacitor resistors on the back, and the back is dense.
Photo:
Board features:
A10 1GHz Cortex-A8 ARMv7 CPU, VFPv3, NEON, Mali 400 GPU, CedarX VPU
512MB DDR3 RAM memory
Optional 4GB NAND FLASH memory
SATA connector with 5V SATA power jack
HDMI FullHD 1080p
2x USB Low-Full-High-Speed ​​hosts with power control and current limiter
USB-OTG with power control and current limiter
100MBit native Ethernet
LiPo Battery connector with battery-charging capabilities
LCD connector compatible with with 4.3", 7.0", 10.1" LCD modules from Olimex
160 GPIOs on three GPIO connectors
MicroSD card connector
DEBUG-UART connector for console debug with USB-SERIAL-CABLE-F
Status LED
Battery charge status LED
Power LED
2KB EEPROM for MAC address storage and more
2 BUTTONS with ANDROID functionality + RESET button
2 mount holes
5V input power supply, noise immune design
PCB dimensions: 84 x 60 mm
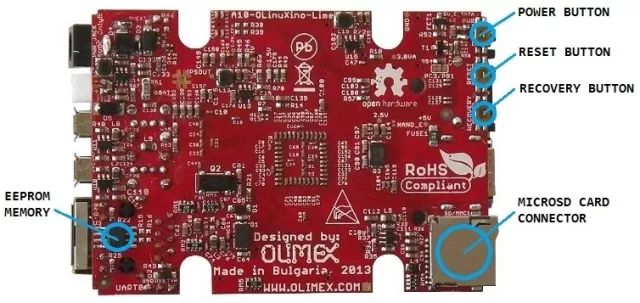
Attach a few function diagrams to explain the powerful functions of the board.

2. System burning and configuration
Using the Debian system, the relevant download address is: https:// ... 0_release_3.torrent
Debian is a free operating system (OS) that provides you with the installation to use on your computer. An operating system is a set of basic programs and utilities that make your computer work. Debian doesn't just provide a pure operating system: it comes with more than 51,000 packages, and these pre-compiled software is wrapped in a good format for installation on your machine.
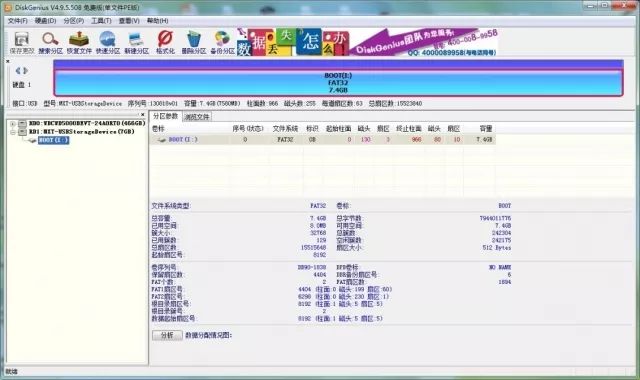
After the download is complete, prepare an sd card and format the sd card I formatted directly with the DisGenius tool. After formatting, it looks like this:
Then use Win32 Disk Imager tool to burn Debian system, select system directory contains .img file, as follows
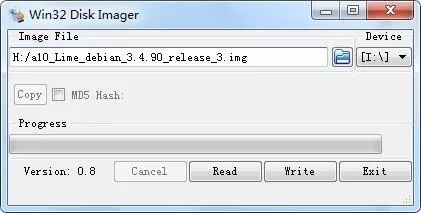
Click the Write button
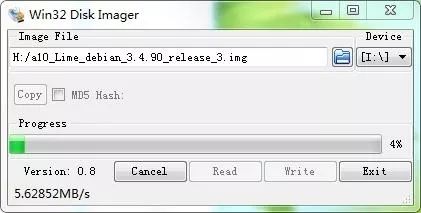
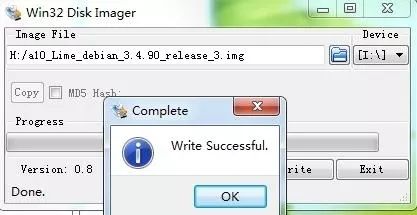
Waiting for the burning to complete, the success has been as follows:
Use the USB to serial port tool to connect to the serial port on the A10-OlinuXino-LIME side to open the putty tool, select the corresponding port COM14 and the baud rate 115200

After login, it looks like this:
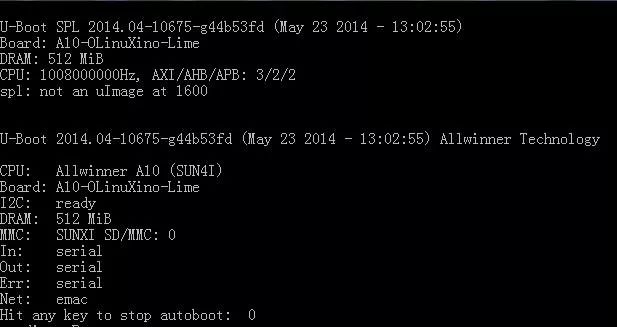
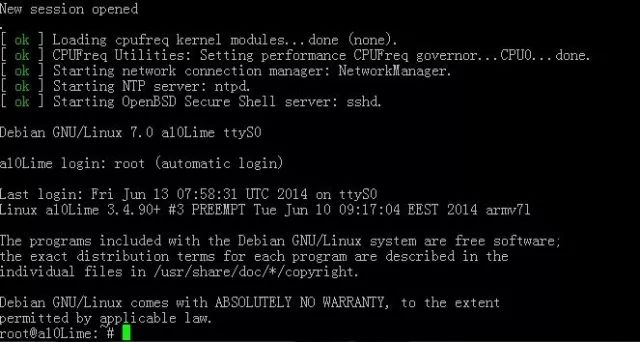
The system defaults to the root user and can be used.
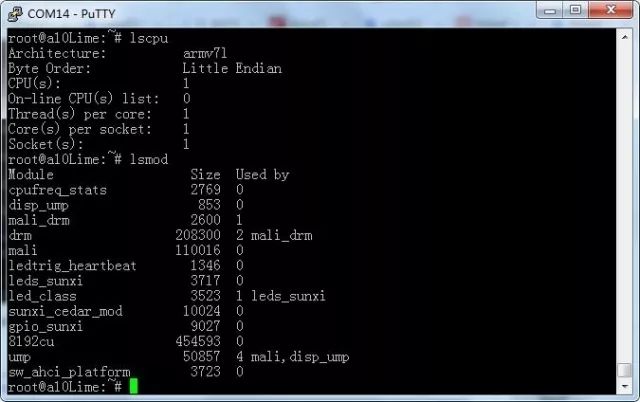
Sudo passwd root
To reset the password, simply view information such as CPU information.
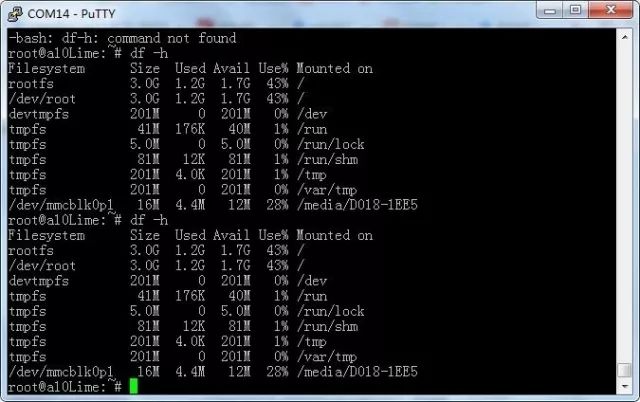
View the memory information as follows: I am using an 8G memory card, the space is divided as follows
3. Network configuration and VNC remote desktop
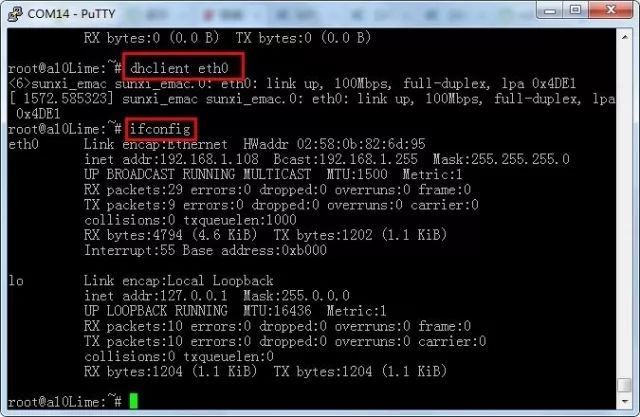
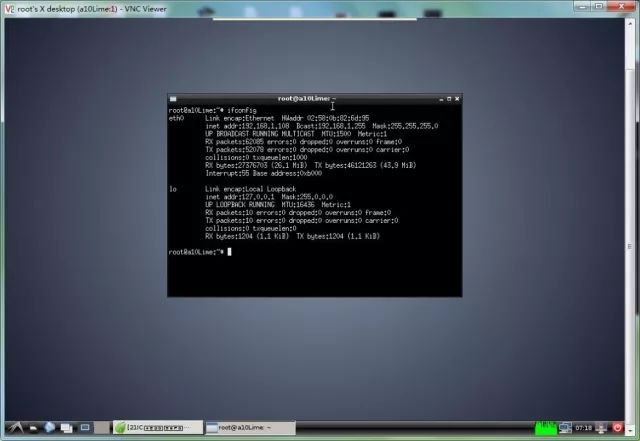
The default Ethernet of the A10-OlinuXino-LIME board is not open. You can use ifconfig to check the network status.
Ifconfig -a
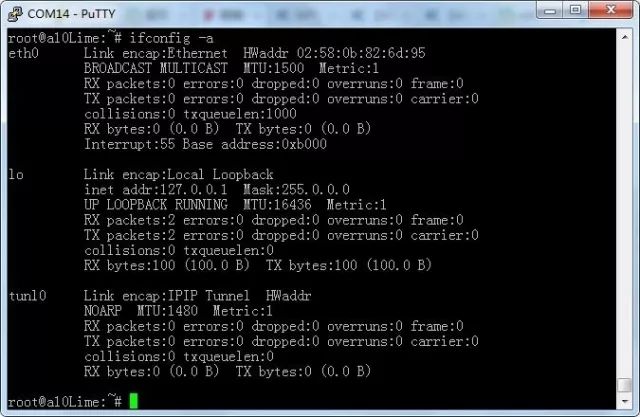
Input, open the network
Dhclient eth0
After configuring the network, install Remote Desktop first.
Sudo apt-get update
Sudo apt-get install tightvncserver
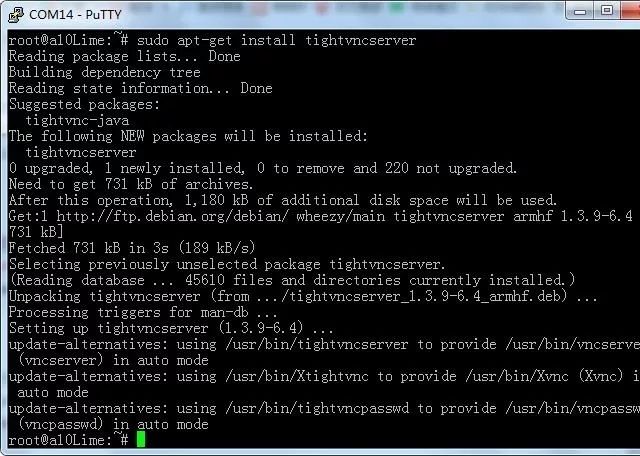
After the installation is complete, enter
Tightvncserver
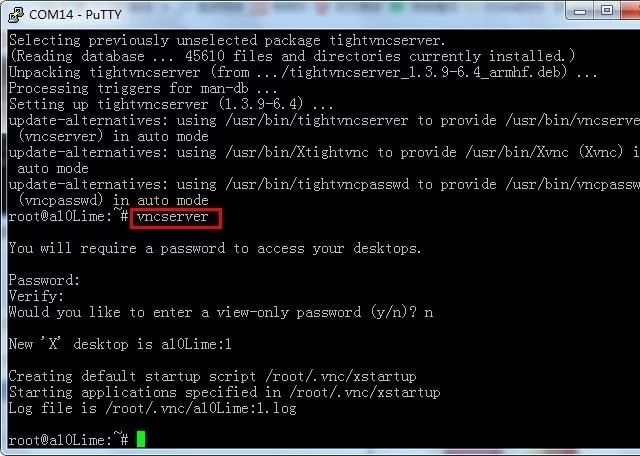
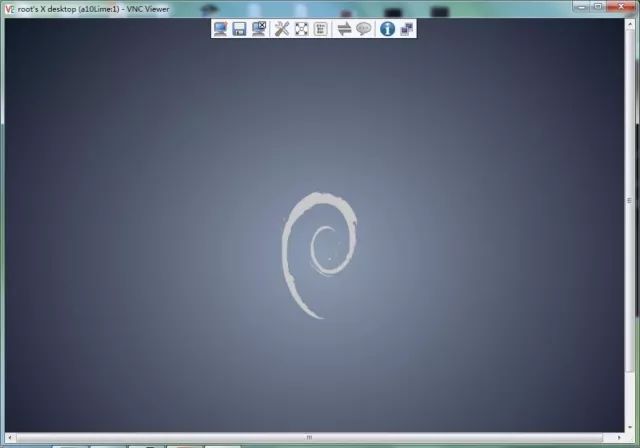
After configuration, you can use the vnc view tool to access the desktop system access results of A10-OlinuXino-LIME as follows:
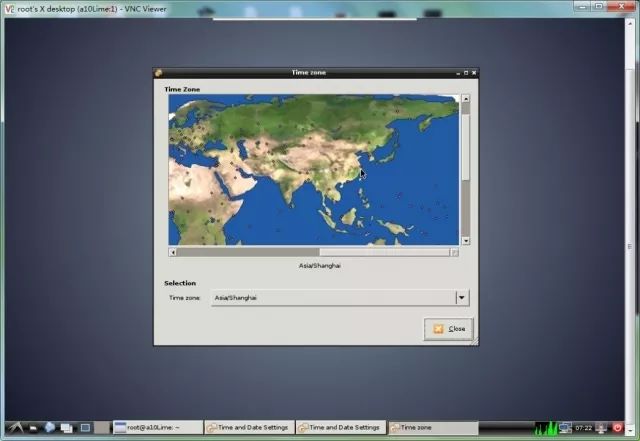
Click on the terminal window in the debian desktop system as shown below
Configuration time and area selection The configuration process for Asia and Shanghai is as follows:
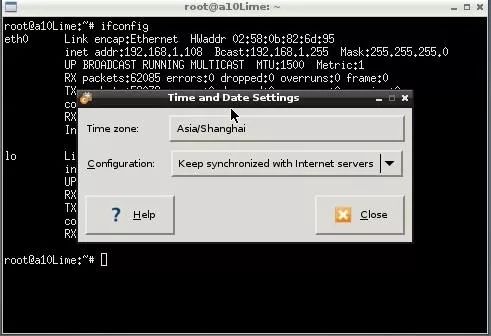
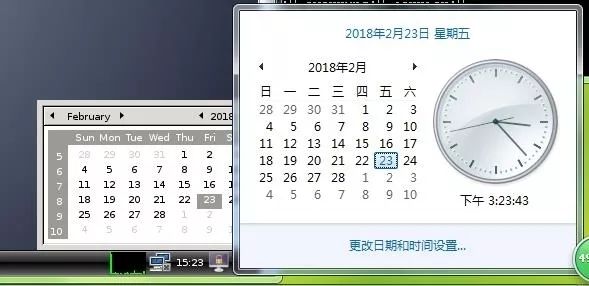
After configuration, you can see that the system time is synchronized with the network time, as shown in the following figure:
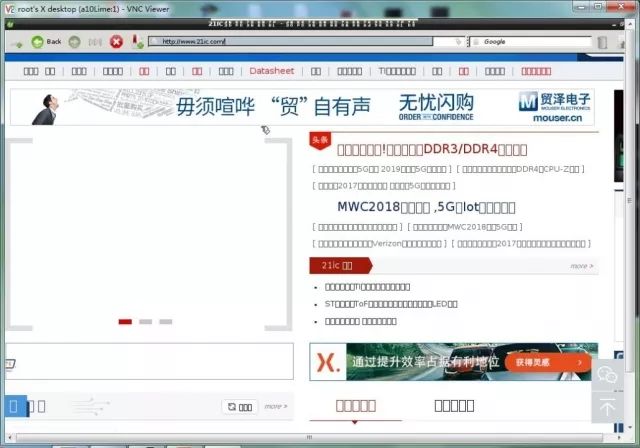
Open the web page test, open 21ic, you can see that the picture English is well recognized, but the Chinese can not recognize it.
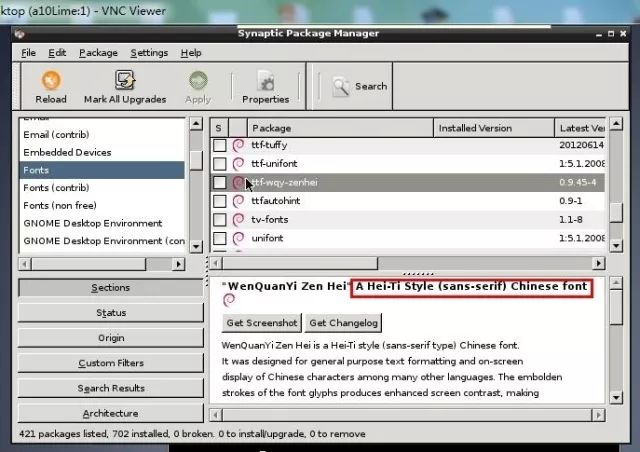
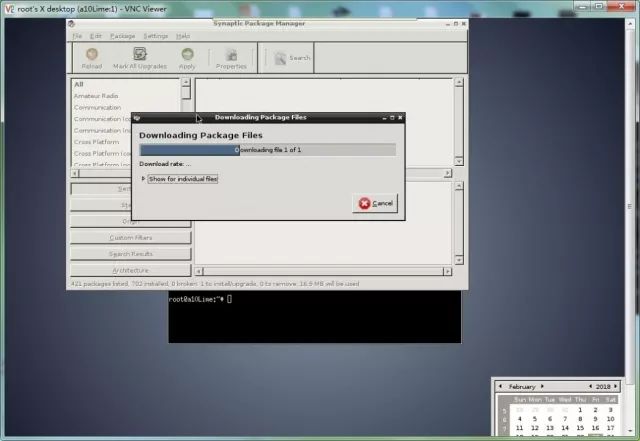
Find the Chinese package, download and install, as shown below
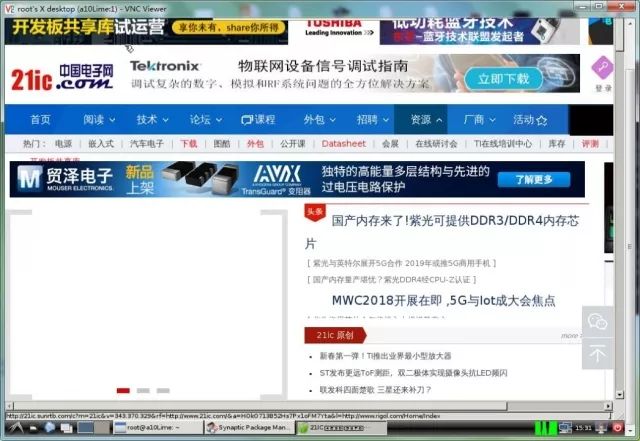
After the installation is complete, refresh the webpage and you can see that Chinese can be supported a lot, as shown below:
4. update update system prompts error resolution
When using apt-get update to update the system, the following error is displayed: Cannot find the available public ID
Reading package lists... Done
W: There is no public key available for the following key IDs:
9D6D8F6BC857C906
W: There is no public key available for the following key IDs:
7638D0442B90D010
W: There is no public key available for the following key IDs:
7638D0442B90D010
Looking for a look, I found a solution. Install several packages as follows:
Apt-get install debian-keyring debian-archive-keyring
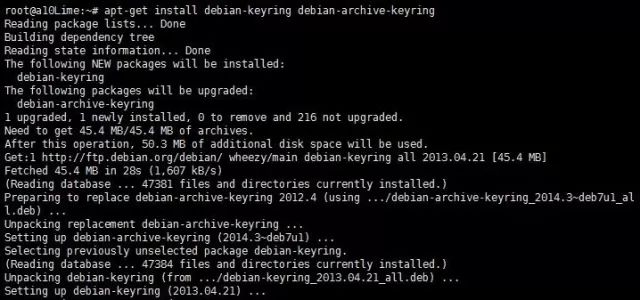
Re-update the system
Apt-get update
You can see that the problem is solved perfectly.
5. Installation of vi/vim editing tool
Since there is no need for a graphical interface, vi is a very efficient text editor. Although there are many graphical interface editors available on Linux, the functions of vi in ​​system and server management are unmatched by those graphical editors. Vim is generally hailed as the best of the class Vi editors. Vim is a text editor developed from vi. Code-ready, compile, and error-jumping are especially handy for programming, and are widely used by programmers, alongside Emacs as a favorite text editor for Unix-like users. The power is not detailed here, interested can be viewed online. Personally prefer vi/vim first remove the vim that comes with the system
Sudo apt-get remove vim-common
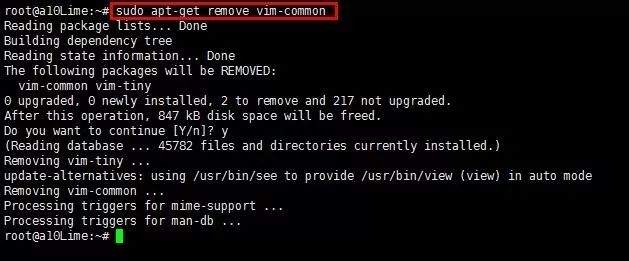
Reinstall a vim
Sudo apt-get install vim
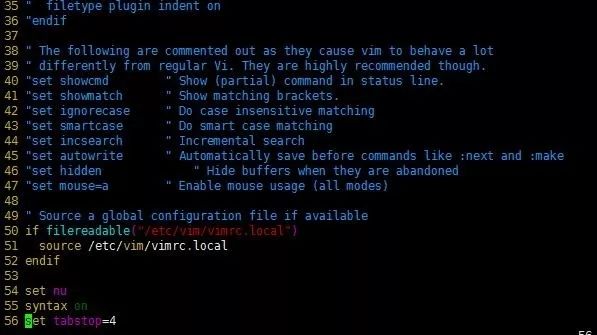
After the installation is complete, add three sentences after /etc/vim/vimrc for convenience.
Sudo vim /etc/vim/vimrc
Attached below is the basic syntax of vi, shortcuts and operating procedures
Vi has 3 modes: insert mode, command mode, low line mode.
Insert mode: In this mode, you can enter characters and press ESC to return to command mode.
Command mode: You can move the cursor, delete characters, and so on.
Low line mode: can save files, exit vi, set vi, find and other functions (low line mode can also be regarded as in command mode)
Open file, save, close file (used in vi command mode)
Vi filename //Open the filename file
:w //Save the file
:q //Exit the editor, if the file has been modified, please use the following command
:q! //Exit the editor without saving
:wq //Exit the editor and save the file
Insert text or line (used in vi command mode, enter the insert mode after executing the following command, press ESC to exit insert mode)
a //Add text to the right of the current cursor position
i //Add text to the left of the current cursor position
A //Add text at the end of the current line
I //Add text at the beginning of the current line (the beginning of a line that is not a null character)
O //Create a new line above the current line
o //Create a new line below the current line
R //Replace (overwrite) the current cursor position and some text following
J //Merge the line where the cursor is and the next line (still in command mode)
Delete, restore characters or lines (used in vi command mode)
x //delete the current character
Nx / / delete the n characters from the cursor
Dd / / delete the current line
Nd / / delete the current line including the current line
u //Undo the previous step
U //Undo all operations on the current line
Copy and paste (used in vi command mode)
Yy / / copy the current line to the buffer
Nyy / / copy the current line down n lines to the buffer
Yw / / copy the characters from the beginning of the cursor to the end of the word
Nyw //copy n words starting from the cursor
y^ //Copy the content from the cursor to the beginning of the line
y$ //Copy the content from the cursor to the end of the line
p // paste the contents of the clipboard behind the cursor
P // paste the contents of the clipboard in front of the cursor
Set the line number (used in vi command mode)
:set nu //display line number
:set nonu // cancel display line number
6. Build a samba shared file system
The Samba service is powerful, which has a big relationship with communication based on the SMB protocol. The SMB protocol not only provides directory and printer sharing, but also supports authentication and permission settings. In the early days, SMB was running on NBT protocol (NetBIOS over TCP/IP), using 137, 138 of UDP protocol and port 139 of TCP protocol, but with later development, it can run directly on TCP/IP protocol without additional The NBT layer uses port 445 of the TCP protocol. Through the Samba service, Windows users can view the shared resources on the Linux server through the [Network Neighborhood] window, and Linux users can also view the shared resources on the server. By setting up the samba shared file system, you can easily access the A10-OlinuXino-LIME system file through the Windows system. Remember to update the system before installing.
Sudo apt-get update
Sudo apt-get install samba
Install samba-common-bin again
Sudo apt-get install samba-common-bin
After the installation is complete, remember to modify the configuration file /etc/samba/smb.conf
Sudo vim /etc/samba/smb.conf
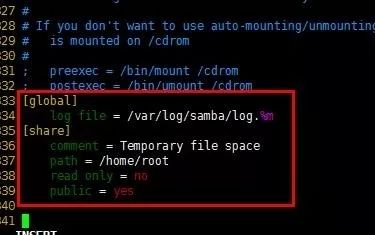
Restart samba
Sudo /etc/init.d/samba restart

There is also a computer network that can be viewed as shown below. A10LIME is a file system shared by samba.
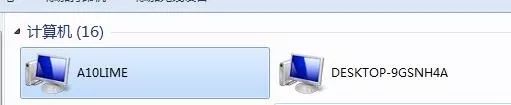
At this point, you can easily access the A10-OlinuXino-LIME system files in the WINDOW system.
7. Implement FTP remote file transfer server
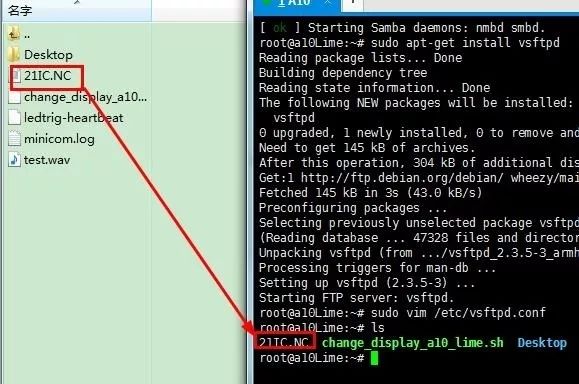
The File Transfer Protocol (FTP) allows files to be shared between hosts. FTP uses TCP to generate a virtual connection for control information and then generate a separate TCP connection for data transfer. Control connections exchange commands and messages between hosts using a TELNET-like protocol. The file transfer protocol is a protocol for transferring files between two computers on a TCP/IP network. FTP is one of the earliest protocols used on TCP/IP networks and the Internet. It belongs to the application layer of the network protocol group. The FTP client can issue commands to the server to download files, upload files, and create or change directories on the server. First install the FTP package
Sudo apt-get update
After the installation is complete, modify the /etc/vsftpd.conf configuration file, as shown in the following figure, the arrow needs to be modified.
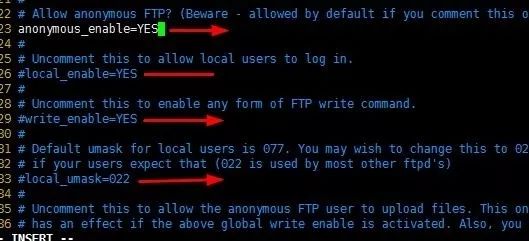
After the modification is completed, it looks like this:
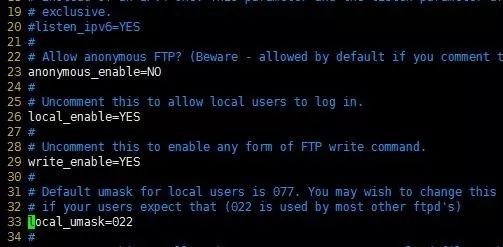
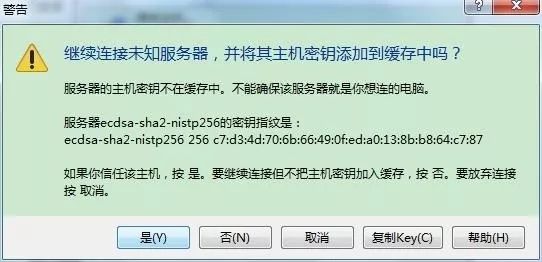
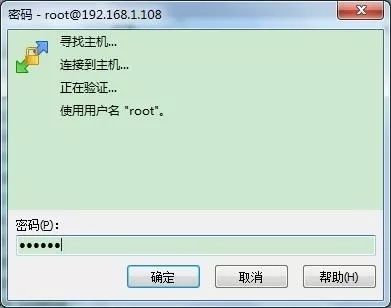
Save the configuration, download an FTP file tool, enter the host IP address username password as shown below, click on the login to see
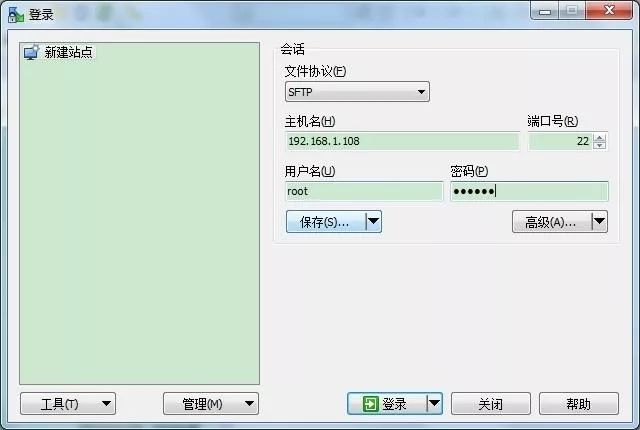
Click yes
Enter the password again and wait for a while
You can see: the computer file on the left and the system file on the right.
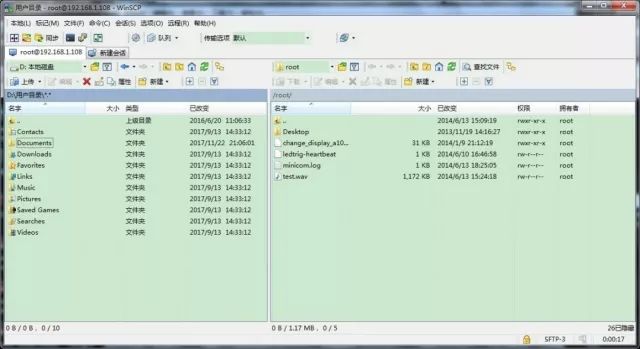
The FTP server is built here, you can remotely access, modify, and drag system files.
This way, in any place, as long as you log in to the server, you can access the file, quite a personal private cloud disk.
8. Making a personal camera
In Taobao Amoy a raspberry pie USB jack camera
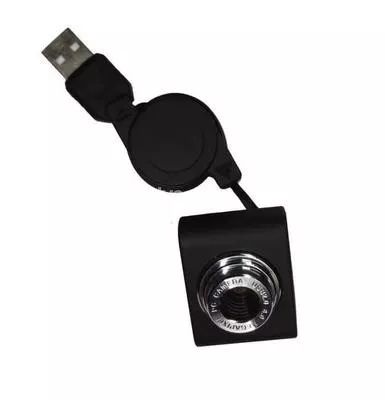
Camera parameters:
Lens focal length: F6.0MM
Focusing range: 20MM to very far
Video resolution: 640*480
Ls /dev
Ls /dev/video*
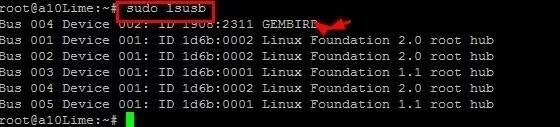
Lsusb
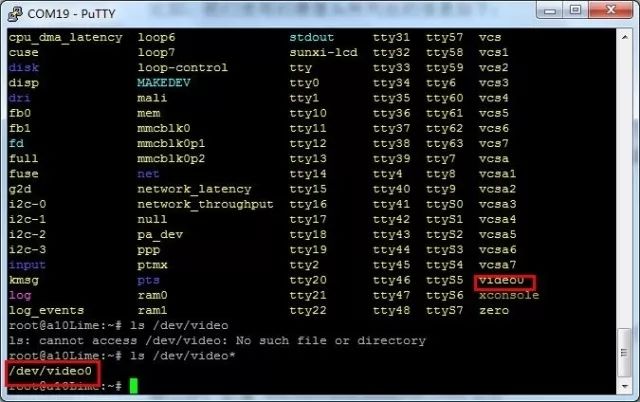
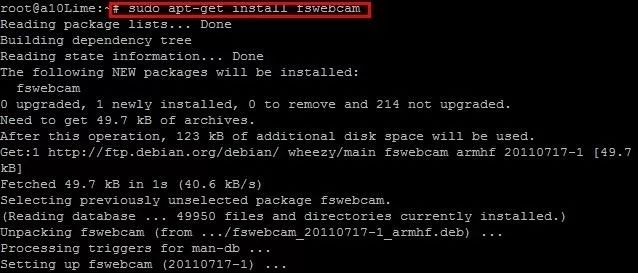
Install the camera package after installing the camera successfully.
Sudo apt-get install fswebcam
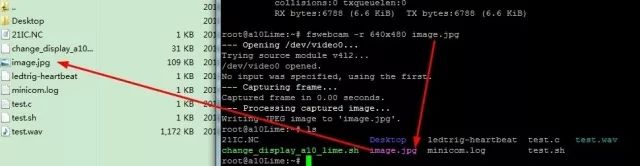
Run the following code, the size of the photo is 640X480, save the name as image.jpg
Fswebcam -r 640x480 image.jpg
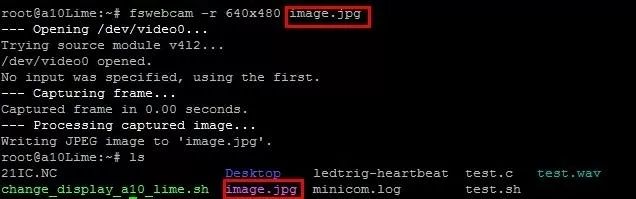
You can also access the hard disk directly through the ftp remote server above to get the picture.
9. Home monitoring - moving object monitoring detection motion
First post two website official website guide: http://Motiongithub source code: https://github.com/sackmotion/motion family moving object monitoring is actually using the camera to monitor an area, when someone or object passes, the camera side Automatically capture moving objects and save them on the hard disk. Now use motion to build monitoring settings
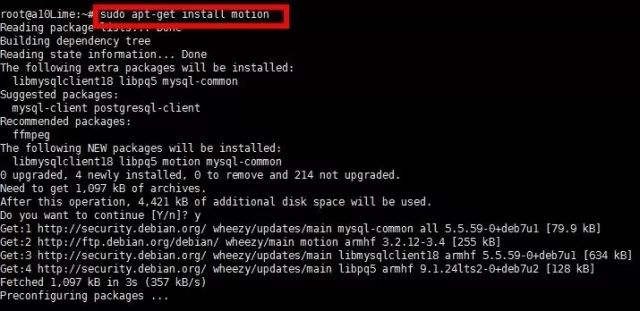
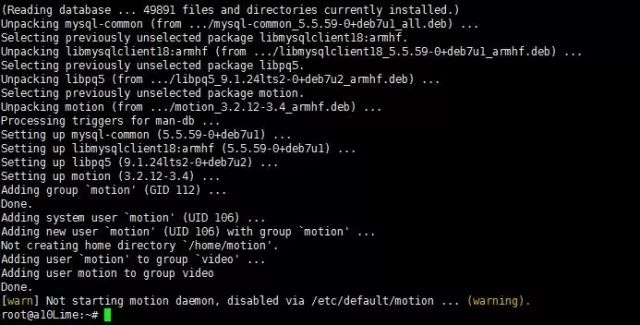
Sudo apt-get install motion
To view the parameters of the motion.conf configuration, you can refer to the following URL https://motion-project.github.io/motion_config.html to modify the configuration file.
Vim /etc/motion/motion.conf

[0] Motion thread 1 restart[1] Thread 1 started[1] cap.driver: "uvcvideo"[1] cap.card: "USB2.0 PC CAMERA"[1] cap.bus_info: "usb-sw-ehci -1"[1] cap.capabilities=0x04000001[1] - VIDEO_CAPTURE[1] - STREAMING[1] Unable to query input -1 VIDIOC_ENUMINPUT: Invalid argument[1] ioctl (VIDIOCGCAP): Inappropriate ioctl for device[1] Could Not fetch initial image from camera[1] Motion continues using width and height from config file(s)[1] Resizing pre_capture buffer to 1 items[1] bind(): Address already in use[1] Problem enables stream server in port 8081: Address already in use[1] Thread exiting[0] Motion thread 1 restart[1] Thread 1 started[1] cap.driver: "uvcvideo"[1] cap.card: "USB2.0 PC CAMERA"[1 Cap.bus_info: "usb-sw-ehci-1"[1] cap.capabilities=0x04000001[1] - VIDEO_CAPTURE[1] - STREAMING[1] Unable to query input -1 VIDIOC_ENUMINPUT: Invalid argument[1] ioctl ( VIDIOCGCAP): Inappropriate ioctl for device[1] Could not fetch initial image from camera[1] Motion continues using width and heigh t from config file(s)[1] Resizing pre_capture buffer to 1 items[1] bind(): Address already in use[1] Problem enabling stream server in port 8081: Address already in use[1]
Thread exiting encountered this situation is that the camera is already running, the reason for repeatedly inputting the motion command means that the camera device has been activated, enter the http://ip address: 8081 on the browser to see the video captured by the camera, as follows Show
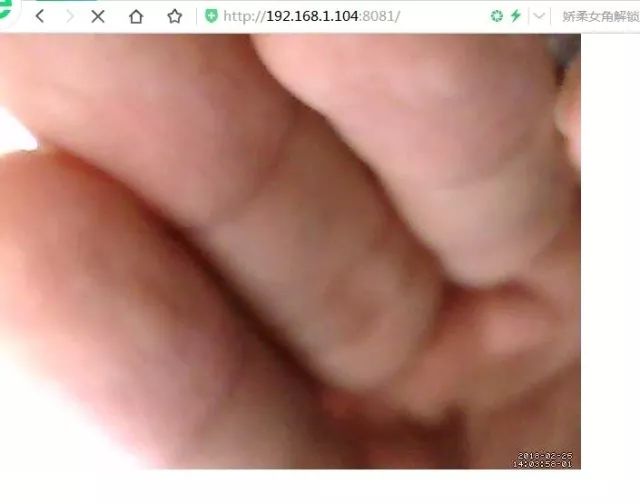
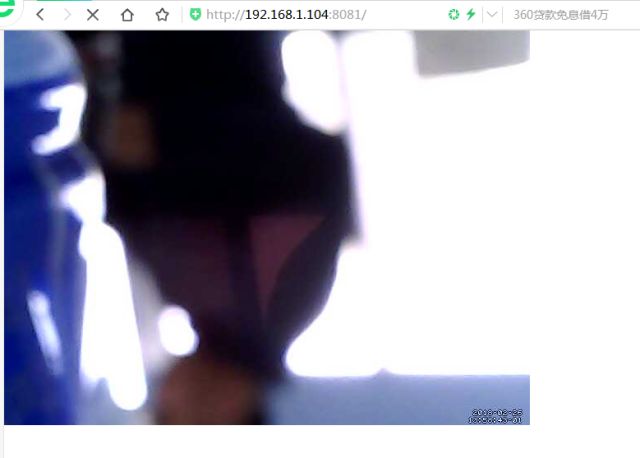
Of course, the video observed by the browser has a delay of a few seconds. . . After the remote monitoring is successful, set the detection location of the moving object, locate the moving object, modify it to on, and frame the moving object on_motion_detected # What command or program is executed when the moving object is detected. But when I actually use it, I can't detect the moving object at all. Later, when I look at the motion profile carefully, I find that the output_motion parameter is the moving object detection, set to on (still see the comments of the configuration document)

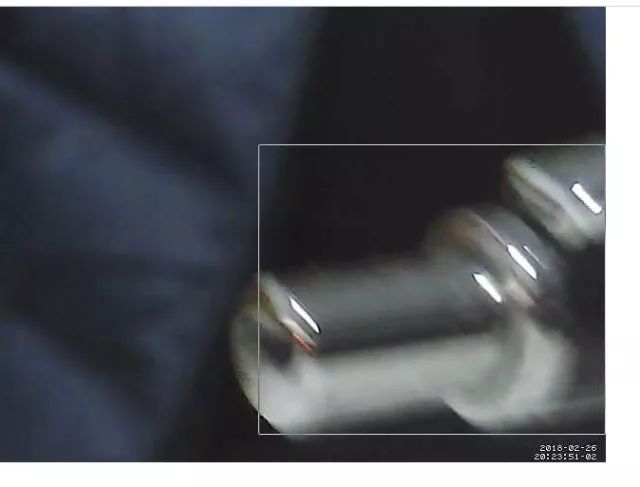
Save, restart service motion restart. You can see that there is a white frame to select the moving object, and the white box color setting is not found in the configuration file.

Finally set the storage address: target_dir is the photo or video storage directory, which is set to mount the /mnt/usb/motion directory of the U disk. The home security monitoring system is set up, and the home situation can be monitored in real time through the remote website. The FTP remote server can also access the mobile hard disk.
Although the A10 is a very old chip, there are still many places to play. It can even be said that in some scenarios where a single application is needed, you can also use it to do some meaningful things and let it play. Warm heat.
Welded Cable ,Seamless Truck Cable,Coaxial Cable Trunk Seamless,Trunk Cable 500Jca
Zhejiang Wanma Tianyi Communication Wire & Cable Co., Ltd. , https://www.zjwmty.com